Number Series
Note: the below documentation is provided by Microsoft. To make sure you are reading the most up to date documentation, please use the official Microsoft Dynamics 365 Business Central documentation link.
Introduction
In Dynamics 365 Business Central, you can use number series to create unique identification numbers for the following types of records:
-
Master tables, such as:
-
Customers
-
Vendors
-
Items
-
-
Sales and purchase documents, such as:
-
Orders
-
Invoices
-
Shipments and receipts
-
Credit memos
-
Posted documents
-
-
Journals
-
Batches
-
Journal lines
-
Numbering is important for more than just identification. A well-designed numbering system also makes the company more manageable and easier to analyze, and it can reduce the number of errors that occur in data entry.
With a numbering system, you can:
-
Have an unlimited amount of number series for all types of basic information (except for G/L accounts) and documents.
-
Set up a combination of automatic and manual numbering.
-
Set up manual numbering only.
-
Set up number series for sequential and non-sequential numbering.
To create a new number series, follow these steps:
-
Select the Search for Page icon in the top-right corner of the page, enter No. Series, and then choose the related link.
-
Select the New button.
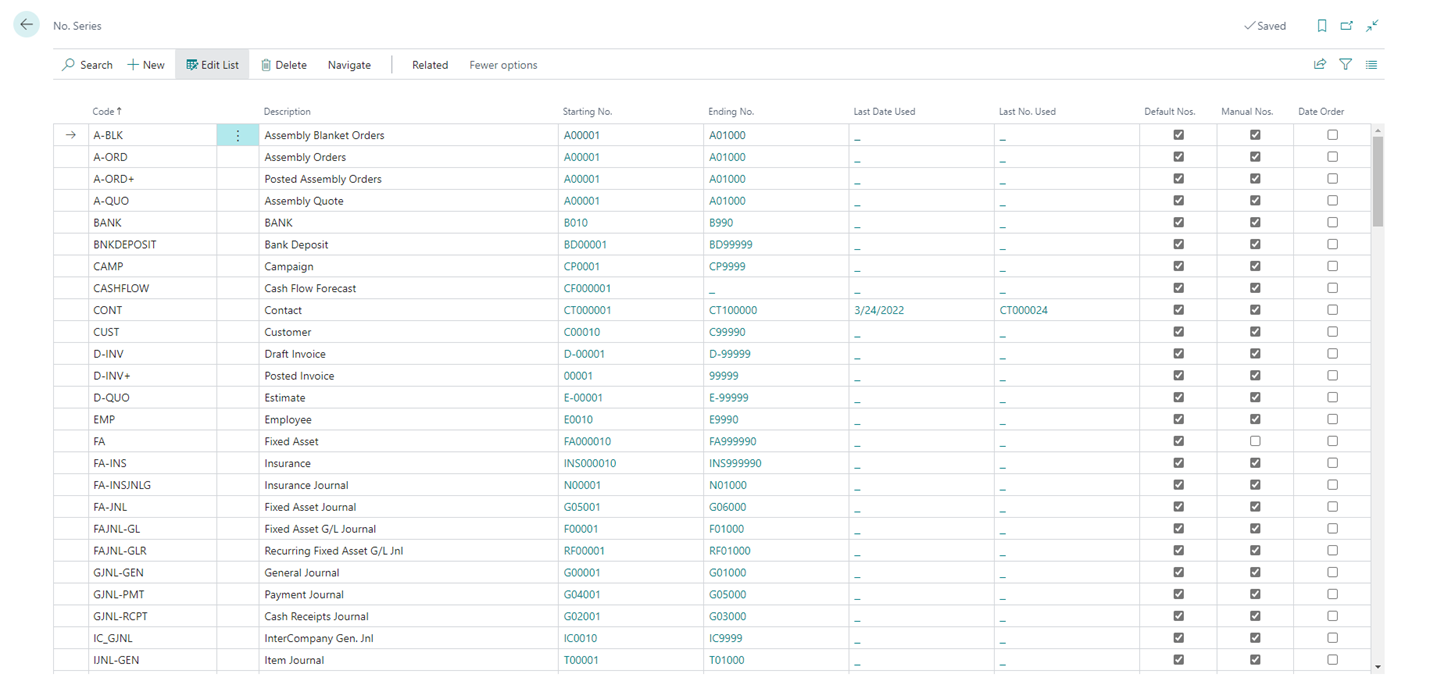
Number series are first set up on the No. Series page, which contains the following fields:
-
Code - A number series code.
-
Description - Description of the number series.
-
Starting No. / Ending No. / Last Date Used / Last Number Used - This data is shown from the underlying No. Series Lines page.
-
Default Nos. - Specifies whether the number series will be used to assign numbers automatically.
-
Manual Nos. - Specifies that you can enter numbers manually instead of using the number series.
-
Date Order - Specifies that the system should verify that numbers are assigned chronologically.
After you have set up a number series, you must set up at least one number series line. The number series line contains information such as the first and last number in the series and the starting date. You can set up more than one number series line for each number series code with a different starting date for each line. This option allows you, for example, to restart numbering sales invoices at the beginning of a new fiscal year.
The No. Series Lines page contains the following fields:
-
Starting Date - The date from which you want the number series line to apply.
-
Starting No. - The first number in the series.
-
Ending No. - The last number in the series.
-
Last Date Used - The date when a number was most recently assigned from the number series.
-
Last No. Used - The last number that was used from the series.
-
Warning No. - Specifies when you want to receive a warning that the number series is running out.
-
Increment-by No. - Specifies the size of the interval by which you want to space the numbers in the number series.
-
Allow Gaps in No. - Specifies that a number assigned from the number series can later be deleted. This is practical for records, such as item cards and warehouse documents that, unlike financial transactions, can be deleted and cause gaps in the number sequence. This setting also means that new numbers will be generated and assigned in a faster, non-blocking way.
-
Open - Indicates whether the number series line is open. The number series line is open until the last number in the series has been used.
Setting up number series
In Dynamics 365 Business Central, you can use number series to create unique identification numbers for the following types of records:
-
Master tables, such as:
-
Customers
-
Vendors
-
Items
-
-
Sales and purchase documents, such as:
-
Orders
-
Invoices
-
Shipments and receipts
-
Credit memos
-
Posted documents
-
-
Journals
-
Batches
-
Journal lines
-
Numbering is important for more than just identification. A well-designed numbering system also makes the company more manageable and easier to analyze, and it can reduce the number of errors that occur in data entry.
With a numbering system, you can:
-
Have an unlimited amount of number series for all types of basic information (except for G/L accounts) and documents.
-
Set up a combination of automatic and manual numbering.
-
Set up manual numbering only.
-
Set up number series for sequential and non-sequential numbering.
To create a new number series, follow these steps:
-
Select the Search for Page icon in the top-right corner of the page, enter No. Series, and then choose the related link.
-
Select the New button.
Number series are first set up on the No. Series page, which contains the following fields:
-
Code - A number series code.
-
Description - Description of the number series.
-
Starting No. / Ending No. / Last Date Used / Last Number Used - This data is shown from the underlying No. Series Lines page.
-
Default Nos. - Specifies whether the number series will be used to assign numbers automatically.
-
Manual Nos. - Specifies that you can enter numbers manually instead of using the number series.
-
Date Order - Specifies that the system should verify that numbers are assigned chronologically.
After you have set up a number series, you must set up at least one number series line. The number series line contains information such as the first and last number in the series and the starting date. You can set up more than one number series line for each number series code with a different starting date for each line. This option allows you, for example, to restart numbering sales invoices at the beginning of a new fiscal year.
The No. Series Lines page contains the following fields:
-
Starting Date - The date from which you want the number series line to apply.
-
Starting No. - The first number in the series.
-
Ending No. - The last number in the series.
-
Last Date Used - The date when a number was most recently assigned from the number series.
-
Last No. Used - The last number that was used from the series.
-
Warning No. - Specifies when you want to receive a warning that the number series is running out.
-
Increment-by No. - Specifies the size of the interval by which you want to space the numbers in the number series.
-
Allow Gaps in No. - Specifies that a number assigned from the number series can later be deleted. This is practical for records, such as item cards and warehouse documents that, unlike financial transactions, can be deleted and cause gaps in the number sequence. This setting also means that new numbers will be generated and assigned in a faster, non-blocking way.
-
Open - Indicates whether the number series line is open. The number series line is open until the last number in the series has been used.
Assign number series and number series relationships
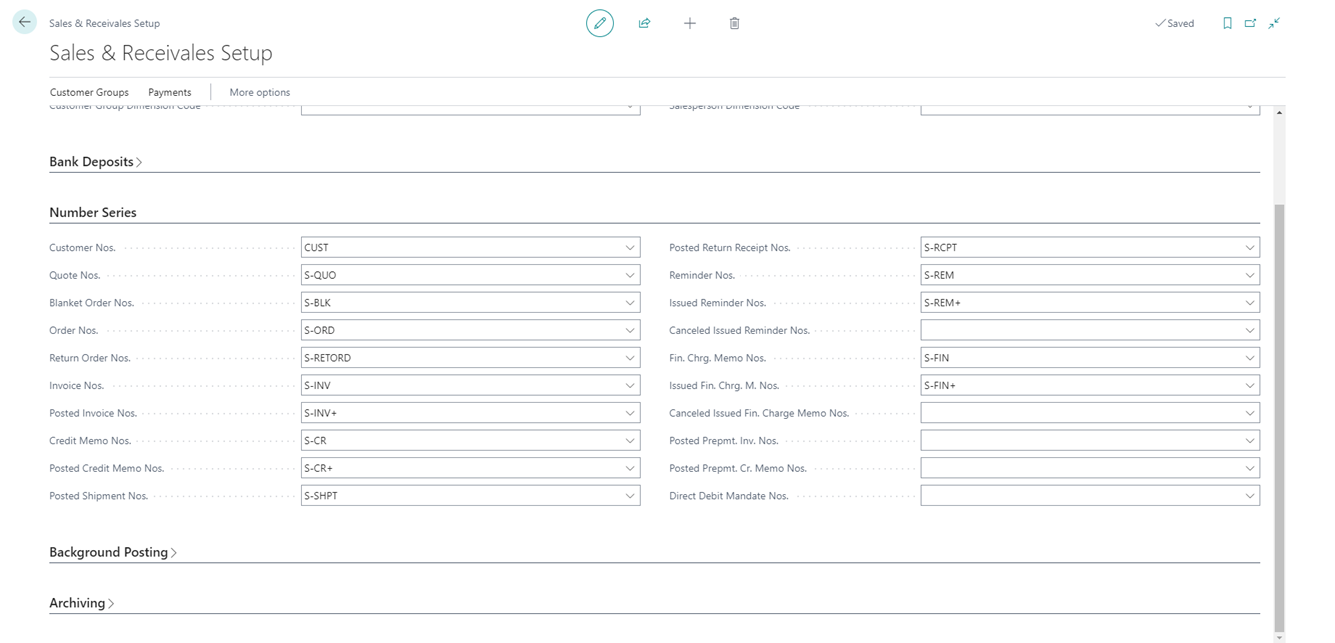
After the number series are set up, they are specified on the setup page for each application area and in the journal templates.
-
Application areas:
-
General Ledger Setup
-
FA Setup
-
Cash Flow Setup
-
Sales & Receivables Setup
-
Marketing Setup
-
Purchases & Payables Setup
-
Inventory Setup
-
Assembly Setup
-
Warehouse Setup
-
Manufacturing Setup
-
Jobs Setup
-
Resources Setup
-
Service Mgmt. Setup
-
Human Resources Setup
-
-
Journal templates:
-
Journal
-
FA journal
-
Cash Flow journal
-
Item journal
-
Warehouse journal
-
You might have to assign more than one code to a single number series for the same kind of basic information or transactions. If this situation occurs, you can create relationships between the related codes. Number series relationships offer the ability to use one of the related number series where another related number series is typically used.
Set up trail codes
For audit purposes, you might have to trace a posted transaction back to its original point of entry in Business Central or know the reason why a certain entry was created.
In Business Central, audit trails begin with two trail codes: Source and Reason.
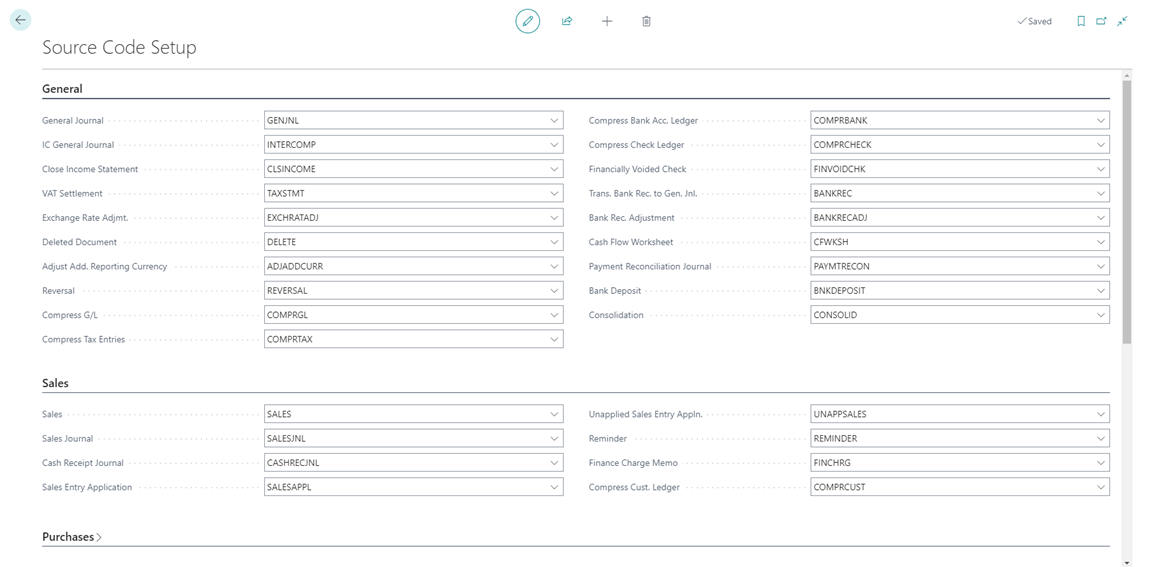
Source codes
Source codes are used to help find the point of origin for an entry. Source codes are the basis for the audit trail in Business Central and are assigned to transactions and journals.
Business Central provides source code system defaults. As new journals or data entry points are added, source codes must be added to determine where the transaction originated.
System defaults and access to the posted entries for each source code are available from the Source Code page. To open this page and review the entries, follow these steps:
-
Select the Search for Page icon in the top-right corner of the page, enter source codes, and select the related link.
-
To review the general ledger entries that were created in the general journal, follow these steps:
-
Find and select the code GENJNL.
-
On the ribbon, on the Related tab, select Source and then G/L Registers.
-
Select one of the lines.
-
On the ribbon, on the Process tab, select General Ledger.
-
Notice that all the general ledger entries were created by one posting in the general journal.
-
Close the General Ledger Entries page.
-
Close the G/L Registers page.
-
-
To create a new source code, follow these steps:
-
On the Source Code page, select +New to set up a new source code.
-
Enter a value in the Code and Description fields.
-
-
Close the Source Code page.
The Source Code Setup page is used to define or change source codes. Additionally, it contains several FastTabs, one for each application area. Each FastTab contains the source codes that apply to that application area.
Typically, the default source code setup is not changed. However, if a different source code identification is required, the changes can be made from the Source Code Setup page.
To change a source code, follow these steps:
-
Select the Search for Page icon in the top-right corner of the page, enter source code setup, and select the related link.
-
To view the options for each appropriate field, select the Look up value icon. The Source Code list appears.
-
In the Code field, select the new code.
-
Press the Tab key or the Enter key to commit the change to the field. All the subsequent posted entries will have the new source code.
-
Close the Source Code Setup page.
Reason codes
Reason codes are used to indicate why an entry was created. For example, if items from a sale must be returned, a reason code is set up to mark the reason, such as damaged, wrong color, or wrong size.
Reason codes can be assigned on transactions, such as sales and purchase invoices, or to specific journal templates and journal batches.
When the codes are linked to a journal line or a sales or purchase header, Business Central marks the general ledger entries with the reason code during posting. This allows the posted ledger entries to be filtered by reason code.
To create reason codes, follow these steps:
-
Select the Search for Page icon in the top-right corner of the page, enter reason codes, and select the related link.
-
Select New to create a new reason code.
-
In the Code field, type a unique identifier.
-
In the Description field, type a short description of the reason code.
-
Close the Reason Code page.